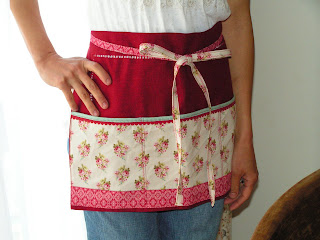
I pulled my sewing table out to the living room so I could work while he watched movies, since he just wanted to be still. I wonder how my husband will react to a big sewing area in the living room... maybe I should move it all out here!
I picked up 4 placemats in the dollar-store type section in Target the other day, knowing I wanted to make something with them, but I wasn't sure what. I've seen so many good placemat projects and tutorials, like this:
 |
| Tea Rose Home - Place mat Apron |
| lil blue boo - Placemat clutch (and if you don't follow this blog, she's an incredible woman with quite a year so far. hop on over there when you're done with me!) |
 |
| The Modern Hive - Pencil Roll |
And so many more I wish I could share, but I'm short on time with little man being sick! Pinterest seems to collect them though.
Anyway, none of these ideas were quite for me, and anyway, I had tacky Easter placemats in multiple colors, with eggs all over them. Plus, they were laminated plastic. Which...wait...plastic??? I know what you can do with plastic!
Make kid-friendly snack bags! Make art supply bags! Make makeup travel bags! They're washable,wipe-able, fairly moisture proof, and with a closure, are perfect to replace plastic baggies. These can be used for so many things!
Here's what I did:
Materials (Makes 4 baggies) -
2 plastic coated placemats - I got mine in the cheapo section at Target, in a $2.50/2 pack.
4 closures - I used zippers, but velcro would be a great alternative. I didn't have enough velcro (and with a sick kid, we're not going out today to find any!)
sewing notions, machine
The Process:
Mark the halfway point of each side, and draw lines dividing the placemat in quarters. Like a plus sign. Use a fabric marker, since pencils can rip through this plastic stuff.
Lay this placemat on top of the other one, lining up all the edges. Pin together in a few places, since plastic tends to slip. I pinned the corners and about an inch in from each side of each line.
Sew a seam on each side of the lines, using the line as a guide for the outside of your presser foot. You should have 2 lines, one on each side of the drawn line, that parallel the drawn line. All in all, you just sewed 4 seams.
The middle should look like this:
Sew a seam down each short side.
Now cut between your seams, following your drawn lines. You should have 4 pieces, each one that is open only on one side.
Now sew in your zipper, with the wrong side facing the wrong side of the open part of the pocket. Sew into place. I'm no zipper expert though...use your best source of knowledge for tips - aka, the internet. The way I sewed them together (making 4 in one blow), while convenient, makes zippers a bit of a pain.
Don't you love that zipper? I picked up a bunch of old ones at our city wide garage sale last year, and they matched perfectly!
Flip and sew the other side into place, unzipping as necessary. When you're done, unzip and pull the bag through the zipper, turning right side out.
You can embellish it at this point - I added a coordinating zipper pull.
Here it is storing my normal sewing table utensils:
Think of how great this would be on car trips with little ones - crayons and markers, goldfish and trail mix...all contained in a washable container. Preferably separate ones. :)
C already adopted it for snacktime.
 |
| Sorry, I haven't cleaned up my threads yet... |
Do you have any placemat projects? I kinda love mine. :)
Back to the caring of sick children now. I hope your day holds nothing harder than making more coffee. Thanks for coming to visit - it makes my day to have your company. See you again soon!


Wow! cute pouches. I love how you knocked off 4 bags at once. Nifty!
ReplyDeletethanks for your kind words, and thanks for visiting!
Deleteoooo, cool!! I like this! I saw that placemat and I almost picked it up to make something with it, a pillow perhaps, but didn't ...I have a super simple placemat pillow tutorial if you'd like to check it out! http://buzzmills.typepad.com/blog/2012/01/placemat-pillows.html
ReplyDeletecute pillows! i thought about that too...but mine are that weird vinyl fabric stuff that would be so sticky...so you can see how it ended up being these pouches! thanks for following and thanks for directing me to your blog!
DeleteI am always in awe of anyone that sew something. I never see placemats that are fun enough to something like this unless they are foam. Thanks for sharing a great project!
ReplyDeleteThe are adorable pouches-and washable to boot-I'm your newest follower-stop over for a visit!
ReplyDeleteGreat tutorial!! This is an awesome idea. Thanks for sharing at Romance on a Dime. I'm definitely pinning this!!
ReplyDelete